

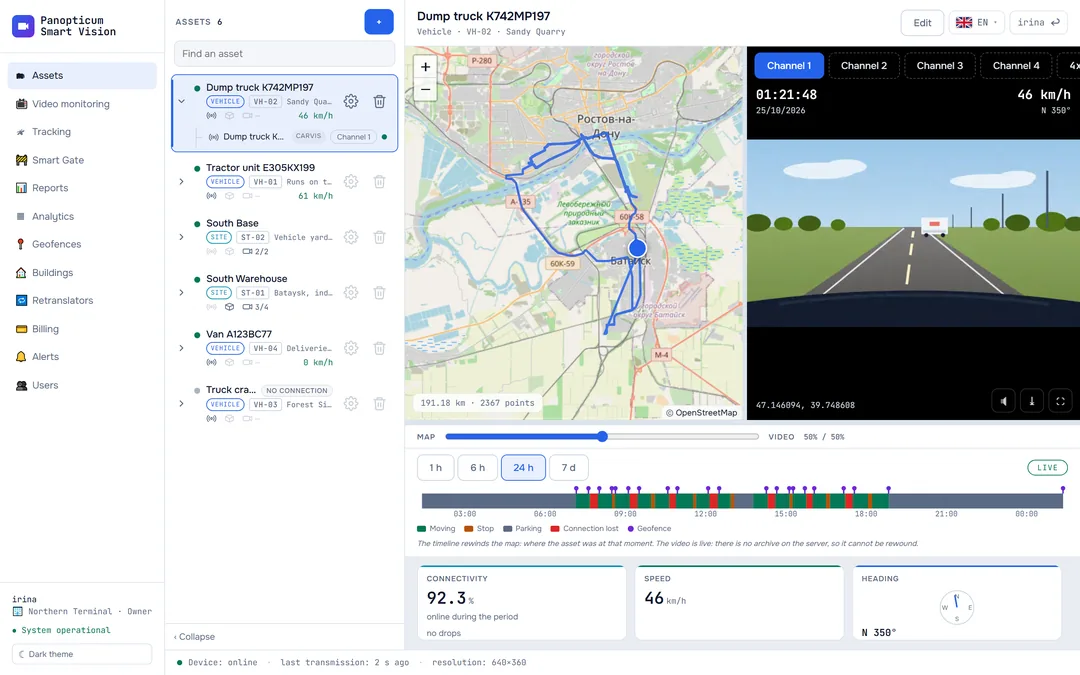
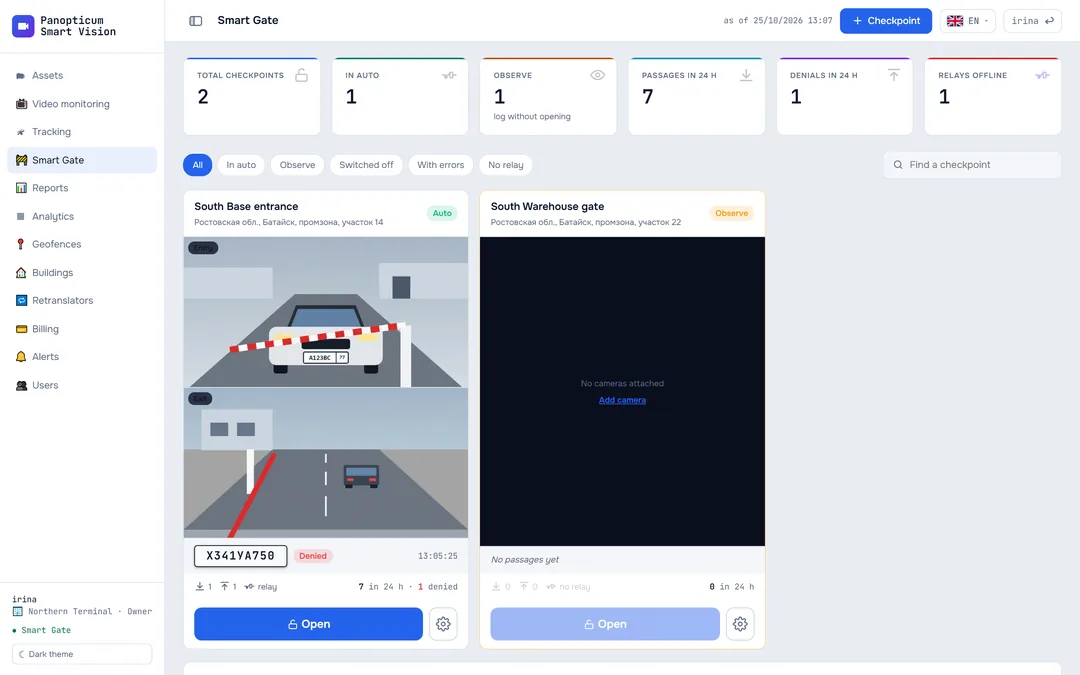
Section “Apps”
All documentation sectionsThe Android app is the Panopticum web app on your phone: assets with the map and video, the video wall, tracking, Smart Gate checkpoints and the other working sections. The data and permissions are the same as in the browser: the app works with the server and keeps nothing of its own except its settings and your sign-in.
Installation
The app is installed from a file on our website: it is not in Google Play or RuStore. You need Android 8.0 or later.
- On your phone, open the Apps page and press “Download for Android” (version 3.3, about 11 MB). From a computer, it is easier to point the phone’s camera at the QR code on the same page.
- Open the downloaded file. The phone asks whether apps may be installed from the browser: allow it once in the settings that open, and go back.
- Press Install. The Panopticum icon appears among your apps.
Signing in

- The same username and password as in the web app
- Your company’s own server
- Registering a new company
- The connection to the server is checked at once
The username and password are the same as in the web app. You sign in once: the phone receives its own access key and signs in by itself from then on, and the password is not stored on it. The key renews itself while you use the app.
- The line at the bottom shows whether the server answers, even before you sign in: if it is red, the problem is the connection, not the password.
- Another server is needed only if your company runs Panopticum on its own server: enter its address.
- Create an account opens the registration of a new company on the website.
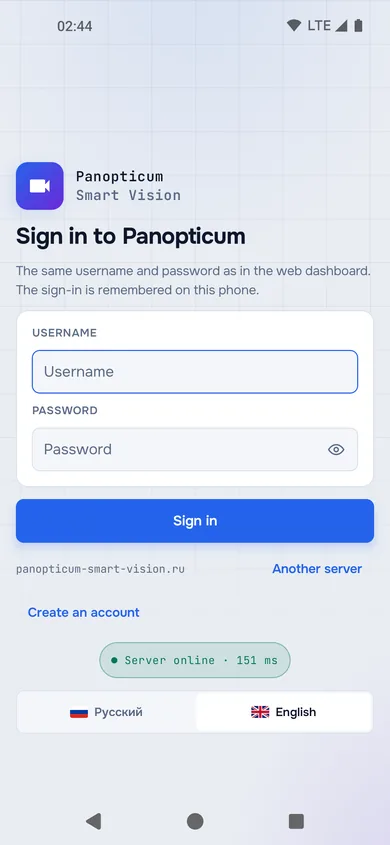
1Install the app from the Apps page and sign in with your web app username and password.
2The connection to the server is checked straight away, before you sign in.
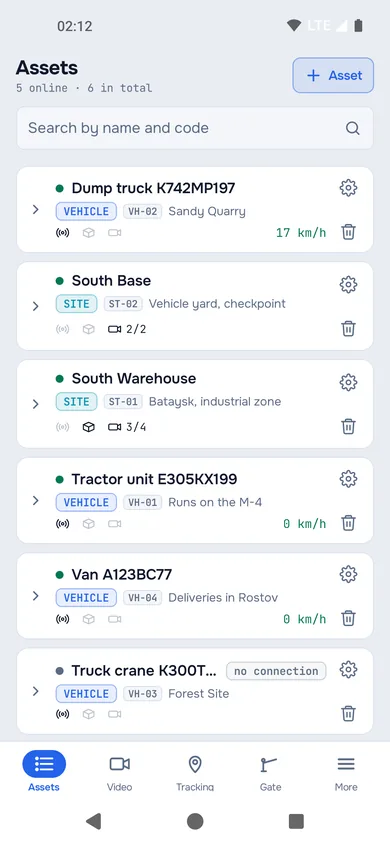
3After signing in, Assets opens, as in the web app.
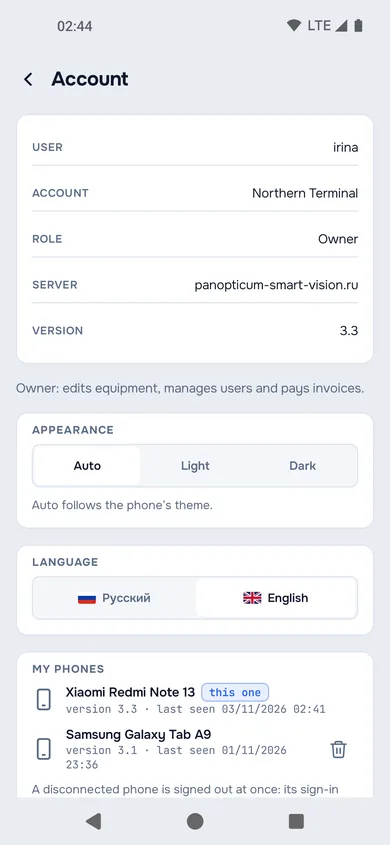
4The account screen shows which phones are signed in.
The bottom menu and More

- Search by name and code
- Expand the asset’s equipment
- Equipment: device, trunk, cameras online
- Edit or delete the asset
- Add a new asset
At the bottom are the four main sections: Assets, Video, Tracking and Gate. The app opens on Assets. The other sections, the theme and your account open with the More button.

- Account: role, theme, my phones, signing out
- The other sections
- Theme
- Open the web app in the browser
- The sections under More are the same as in the left menu of the web app: reports, analytics, geofences, buildings, retranslators, billing, alerts, cameras and, for the owner, users.
- Theme: Auto follows the phone’s theme; Light and Dark set it explicitly.
- Language: Russian or English, each marked with its flag. Switching the language restarts the app and keeps you signed in. You can also choose the language on the sign-in screen. A new installation takes the phone’s language by itself, while an app you have already signed in to keeps its language after an update.
- Open the web dashboard opens the full web app in the phone’s browser.
Assets
In the list, each asset shows its connection state, type, code and an equipment counter: the device, the trunk and the cameras online. The arrow on the left expands the equipment tree; the cog opens the asset for editing. A tap on an asset opens its card.

- The map with the track for the chosen period
- Live DVR video
- DVR channels: the vehicle’s cameras
- Readings: connectivity, speed, heading
- Asset settings

- The timeline: a tap moves the map to that moment
- The timeline period
- Timeline colours: moving, stop, parking, connection lost
- The asset’s device and its protocol
- At the top is the map with the track for the chosen period, with live video under it. The buttons under the video switch between the asset’s cameras and the DVR channels; if the DVR is offline, its channels are greyed out.
- Tiles with readings: connectivity, speed, heading and others, depending on what the device sends.
- Further down is the timeline. A tap or a drag along it moves the vehicle on the map to the chosen moment; the video stays live, as there is no video archive on the server.
- At the very bottom is the asset’s equipment: the device with the name of its protocol, the trunk and the cameras.
More in Assets.
Video

- Grid: one, two or three tiles in a row
- A camera tile: name, site, state
- A camera with no picture: Offline and the test card
- Vehicle DVRs: video at the press of a button
- Start the DVR video
A video wall with all the account’s cameras. The grid buttons set how many tiles there are in a row: one, two or three. A camera with no picture shows the test card and the word Offline.
Below it is the DVRs block: video from a vehicle’s DVR travels over the vehicle’s mobile connection, so it never starts by itself, only with the Watch button.

- Live camera video
- The PTZ control: the camera turns while you hold an arrow
- Back to the video wall
A tap on a tile opens the camera full screen. A PTZ camera has a control under the picture: the camera turns while you hold an arrow and stops when you let go. More about video in Video monitoring.
Tracking

- A tap shows the device’s telemetry on the map
- DVR video
- Add a device

- Panel buttons: device connectivity, WIM stations, the device list
- Device telemetry: speed, heading, connectivity, last packet
- Follow: the map follows the vehicle; History: the track for a period
The map with the account’s devices. The buttons at the top open the device connectivity panel, the WIM stations on the map and the device list. A tap on a device in the list or on the map opens its telemetry: speed, heading, voltage, fuel and whatever else it sends, and the time of the last packet.
- Follow: the map follows the vehicle and keeps it in the centre.
- History: the device’s track for the chosen period.
- Carvis DVRs have a button in the list for video from the vehicle’s channels.
More in Tracking.
Checkpoints

Smart Gate checkpoints with their latest passages. A checkpoint’s card shows the passage log with frames, the passes and, if you have the rights, the button that opens the barrier. More about checkpoints in Smart Gate.
The account and my phones

- Your role in the account
- Theme
- My phones: this one and the others you are signed in on
- Disconnect another phone: its sign-in stops working at once
The row with your username under More opens the account screen: the user, the company, the role, the server and the app version, the theme and the My phones list.
- My phones lists every phone signed in under your username; the current one is marked this one.
- If you have lost or replaced a phone, disconnect the old one with the button next to it. Its sign-in stops working at once; there is no need to change the password.
- Sign out at the end of the screen signs out of the account on this phone.
Updates
The app checks for a new version by itself soon after start-up and then every few hours. If there is one, a window appears with the version number and the list of changes: Update downloads it and installs it over the old version, and your sign-in and settings are kept. Skip postpones that particular version; the app will offer the next one again.
If it does not work
- The file does not open or the phone will not install it. Allow app installs from the browser you downloaded the file with: the phone opens this setting by itself on the first attempt.
- It says the username or password is wrong. Enter your web app username and password. After ten failed attempts within an hour, signing in is closed for a while.
- The app went back to the sign-in screen. Your sign-in on this phone has been disconnected (from another phone or by the account owner), or your user account has been deleted. Sign in again or contact the account owner.
- The access suspended screen. The company has an unpaid invoice. The owner can pay it right in the app, in Billing; access comes back by itself after payment.
See also
Found a mistake, or didn’t find an answer? Write to us on Telegram or send us a request, and we will reply and fix the article.